Many deciduous trees, shrubs, and roses are available as bare-root plants. Before shipment, growers dig the plants when they’re dormant, wash the soil off the roots, and wrap the roots in wet packing material. You have greater freedom when it comes to when and where you plant your laurel plant if it comes with a root ball.
By spring arrives, your hedge is ready to flourish throughout the summer. Despite this, November remains the most OF month. Bare-root plants are available for purchase in the spring and must be planted immediately.
Start planting in November when the ground is still warm if you’re trying to figure out how to grow laurel and use bare-root laurel. The ground should also be dry because bare-root laurel is susceptible to rot if left in water for too long.
This article will explain how you can plant bare-root laurel following some easy to follow processes. Let’s get started;
How To Plant A Bare-Root Laurel
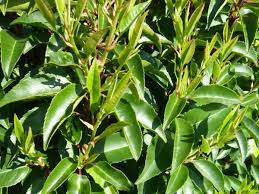
Any garden would be incomplete without the Bare-Root Laurel tree. Laurel does well in most environments, but you may want to choose elsewhere if you live near the seaside. To plant them, follow these steps:
Step 1: Getting the Soil Ready
While you prepare the ground to receive your laurel plants, keep the roots covered, particularly bare-root laurel. Before they are buried, you want to minimise their exposure.
You want to give your laurel hedge the best chance of thriving by removing competition for nutrients. Before planting the hedge, clear the area of any grasses, weeds, or other plants. Clear the area thoroughly before planting and compost any turf, weeds, brambles, or other plants you have removed. As long as the weedkiller has dried on the grass or weeds (this usually takes about 6 hours in good conditions), it has no residual effect on the soil. It will not harm the roots of any hedging plants.
Step 2: Creating a pit
Laurels should be planted in trenches at least ten inches wide to accommodate their bare-root size. Spreading your plants out might double the root ball’s width and add a few inches to the depth of the trench. Eighteen inches to two feet apart in a trench is more efficient than digging individual holes for your plants.
Dig square holes that are roughly twice the width of the rootball. Dig the holes to the rootball’s depth plus an inch or two. It’s critical to break up the dirt in the bottom of the hole to at least another spade/fork depth, allowing the roots to penetrate the soil readily.
You should expand the trench to one or two feet for plants taller than four feet. As long as the roots have room to grow, you should be OK.
Rootgrow and feed should be applied at the bottom of the hole if the soil is poor or harsh. This mycorrhizal fungus helps the plant create a robust root system by creating a secondary root system associated with its roots.
The dirt at the bottom of the trench must be loose enough to allow the roots to penetrate. When digging it, use a fork to turn over the earth in your trench, especially if you employ a digger, which compacts the material.
Step 3: Time to plant
Bare-root laurel trees do not require a lot of maintenance. The soil may often collapse when moist, making it difficult for roots to develop, so avoid planting while the ground is frozen or after a heavy storm—plant laurel bushes in the trench at a distance of 18 to 2 feet apart.
You may feed your plants with fish blood and bone or a slow-release feed if your soil is of good quality. Sand or heavy soils should have a loam-based compost applied. If it’s exceptionally windy, limit the time your plant’s roots are exposed to the wind.
If your garden is exposed to the wind, be sure to anchor any more than four feet tall plants. Pegs between feet and eighteen inches tall and positioned at 45 degrees to the wind are ideal for this task. Using your foot or a shovel, crush the ground around the plants’ top as you try to fill the trenches.
Before they are transported to you, the roots of bare-root plants are wrapped and packed in sleeving or cartons. Insert the plant into the hole with care. If the top of the rootball protrudes more than one or two inches over the top of the hole, this is a problem.
Their original packaging will keep them fresh for a few days.
Step 4: Trimming and pruning
Except for quickthorn, blackthorn, bare-root privet, and laurel, which may be trimmed by a third to half of their height to make them highly bushy from the start, most hedge plants do not require pruning after planting.
Trim your laurel hedge in late spring or early summer to cover up any leaves that are left looking “tatty” after using a hedge trimmer since the hedge will generate new shoots extremely fast. A small hedge can be pruned with secateurs, whereas an enormous hedge may be pruned with a trimmer. Most evergreens don’t need to be trimmed until the second year, when the sides can be softly cut to form.
Trim the top of your new hedge slightly short of the ultimate height you want it to be, as this will help it fill out. Trimming dead and broken branches will help your laurel grow quicker but pruning it into green growth every couple of months will also help it grow faster and thicker.
As a general rule, deciduous hedges should be trimmed in the middle to late summer. In contrast, evergreen hedges should be trimmed in the early spring or early fall. However, there are always exceptions; recommended trimming times for all hedge species may be found on our website or catalogue.
Common Problems With Bare-Root Laurel trees
Bare-Root The resilience and minimal care needs of Laurel trees are well known. Most gardeners have little trouble with them. Yellowing of leaves, for example, is a common problem.
Even though these trees are drought resistant, black foliage might signal dehydration. If this happens, properly rinse the area. Ensure the soil isn’t excessively damp, as this might cause other problems. Overwatering can lead to root rot and fungal infections, so grey leaves are a red flag. If you notice grey leaves, cut down on the watering. If your soil isn’t draining correctly, consider adding sand to aid in this process.
FAQ
Should you soak bare-root plants before planting?
Plant the bare root plants as soon as new growth appears. This thorough soaking will aid the plant’s establishment. Dig a hole large enough and deep enough to accommodate the plant without bending or crowding its roots.
Can Bare root trees grow in summer?
Trees should only be planted potted in their soil in the summer, rather than bare-root, where the root ball is exposed, and the soil has been washed away. Due to a lack of water, bare-root trees are more susceptible to stress. They might exhibit indications of stress before being planted.
How long can bare-root plants survive?
Although bare-rooted plants can survive up to two weeks in travel, it is best to plant them as soon as possible. Soak the roots in water for no more than 12 hours before planting. This procedure allows the plant to rehydrate without smothering its roots.
Conclusion
Most of the work is done by the time your plants have been established and ‘filled out, and they should then be healthy and growing strongly. We recommend an annual feed and mulch in spring, keeping the hedge in tip-top condition. The fertiliser will become available when the roots develop deeper, giving them an enormous boost.
Bare root trees will probably need to be staked for one year. When you put the stakes in, make sure the stakes are in the undisturbed area around the plant.
Now, as mentioned above, gently sow your seeds so that you can enjoy the growth of your Bare-Root Laurel.

